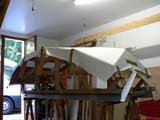
Pictures of the HALFLING pram building process.
HALFLING pram has the advantage to be cut in two parts: one forward part and one aft part. She is fit out with a sail of 37.2 ft² and with a central seat wich clamps the two parts together.
She is entirely built in 1/4” and 1/2” plywood. The mold stations and all the building jig are in plywood. Its both easy to join with glue and screws and sturdy enough to work on it.
|
 The building jig : are the stations in line ? The building jig : are the stations in line ?
|

|
 To determine the dimensions and the shape of the bottom you have to make a template. To determine the dimensions and the shape of the bottom you have to make a template.
You wrap the bottom with paper that you tight beetween the transom, the bow and all the mold stations. Then you mark and you draw the edge. I used here a paper tablecloth roll.
|

|
 I cut the paper template. The blue line you see is the chine line, the edge of the bottom panel. I cut the paper template. The blue line you see is the chine line, the edge of the bottom panel.
|

|
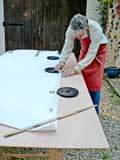
 The template lay flat on the bottom plywood sheet. If it is not well cut out you can draw some smoother curves. Here I use an electric conduct kept in place with weights. The template lay flat on the bottom plywood sheet. If it is not well cut out you can draw some smoother curves. Here I use an electric conduct kept in place with weights.
|

|
 The bottom wich was cut is epoxy glued and screwed or nailed on the transom and on the bow. Some drywall screws in the mold stations can help. Here you can see the bow. The bottom wich was cut is epoxy glued and screwed or nailed on the transom and on the bow. Some drywall screws in the mold stations can help. Here you can see the bow.
|

|
 To draw the sides you apply the panels against the mold stations, the transom and the bow and you draw around them. The plan suggests to make a paper template as for the bottom. To draw the sides you apply the panels against the mold stations, the transom and the bow and you draw around them. The plan suggests to make a paper template as for the bottom.
|

|
 The plywood is stiff. All mean is good to keep them in place. The plywood is stiff. All mean is good to keep them in place.
|

|

|
 Here is the time to glue the gunwales strips on. You see they also are made of plywood. Here is the time to glue the gunwales strips on. You see they also are made of plywood.
|

|
 At last ! For the first time upside up At last ! For the first time upside up
|

|
 I had to saw the building jig to get the boat out because one part got stuck. She needs bow surgical. I had to saw the building jig to get the boat out because one part got stuck. She needs bow surgical.
|

|
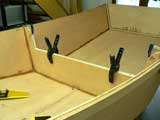
 I am building a two-piece HALFLING.The bulkheads are fitted and glued in place. They are separeted from each other with a piece of corrugated plastic. When the plastic is removed you can cut the boat in half, sawing in the slot.. I am building a two-piece HALFLING.The bulkheads are fitted and glued in place. They are separeted from each other with a piece of corrugated plastic. When the plastic is removed you can cut the boat in half, sawing in the slot..
|

|
 Outdoors for the first timeThe daggerboard trunk is already set on. This plywood is really pinky ! Outdoors for the first timeThe daggerboard trunk is already set on. This plywood is really pinky !
|

|
 Its the turn of the deck. Opposite to the plan I fit the splashrail forward reclined. On the plan it is perpendicular. Its the turn of the deck. Opposite to the plan I fit the splashrail forward reclined. On the plan it is perpendicular.
|

|
 Here is the skeg. Here is the skeg.
|

|
 And there is the daggerboard in its trunk. And there is the daggerboard in its trunk.
|

|
 The Great Sacrifice(1).Just sawned. The forward part. The Great Sacrifice(1).Just sawned. The forward part.
|

|
 The Great Sacrifice(2).The aft part The Great Sacrifice(2).The aft part
|

|
 Setting the seat. Here you can see the seat wich straddles the bulkheads. The bolt holes have just been drilled. Setting the seat. Here you can see the seat wich straddles the bulkheads. The bolt holes have just been drilled.
|

|
 Ready to sail away. Ready to sail away.
|

|
 Getting on board for the first time. How to arrange my 6’2” ? Getting on board for the first time. How to arrange my 6’2” ?
|

|
 Checking the rudderHALFLING is really very stable Checking the rudderHALFLING is really very stable
|

|
 First leg This sheet is not made to be knitted. You have to keep it tighten. First leg This sheet is not made to be knitted. You have to keep it tighten.
|

|


